Customising BlogrCart MukaBuku e-commerce Blogger template is made easier with this how to's and guide. It is important that the initial set-up is successful before going on to the custom features. Before any customizations, make sure that your shopping cart functions are working well, which includes the built in Send Order e-mail & Paypal checkout features. Details are explained here with illustrations as your guide http://blogrcart-mukabuku.blogspot.com/p/install-shopping-cart-blogcart-templates.html.
Instructions here includes editing & customizing mobile navigation links, customize how image carousel displays, click to action buttons, safely remove non-required shopping cart functions, editing social icons url's, editing pre-installed on-line payment logos displayed, removing tax functions, removing shipping/delivery functions and more.
Basic Template Colour/Background Customizations
We also included a designer section in the template CSS codes for you to customize the basic template colurs & backgound colour just by using simple HEX codes. Indicators are provided for your preference.Expand <b:skin> to view the CSS styles used.

Head over to below section for customizations.

Add Parallax Image Banner
At any page, click the " Pencil " icon to insert/upload your preferred image. Below is an example of the banner image used at the demo page.Preferred image is at 1600px wide and 480px height at 150kb (or below) in image file size. The image will be scaled automatically according to the container and centred in view.
Add Facebook App ID
At screenshot below, add in your Facebook App ID in order to fully utilize Facebook Developer Plug-ins. Fb App ID is required to optimize the usage of the many Facebook plug-ins that comes with BlogrCart MukaBuku pre-made blogger template.If you do not have one, then head over to this page and the full tutorial with illustrations is provided. 10 simple (an easy) step by step guide to create your own Facebook App ID & to activate the Fb Developer's plug-in which also fully utilise Facebook integration with your blogger store.

Additional customizations is also required for Facebook meta tags which is also pre-installed with BlogrCart MukaBuku e-commerce featured blogspot template.
At below screenshot, customize the Facebook powered meta tags in order to fully utilize facebook apps pre-installed with this blogger template.
Customization here includes your Blogger store site name, your Facebook App ID & your Fb URL dedicated to your Facebook profile page. Examples included for your reference.

You can also customize Facebook Recommends plug-in by going to Blog1 widget & expand <b:includable id='post'/> and find below codes:-
<div class='fb-facepile' data-colorscheme='light' data-href='https://www.facebook.com/irsahindesigns' data-max-rows='1' data-show-count='true' data-size='small' style='margin-bottom:1em;'/>
Replace the highlighted code above to the URL to your Facebook Profile/Pages page.
Main Navigation Drop Down Editing
Find below codes to edit the main navigation drop down links. An example format is given in template codes.
An example of a main navigation without a drop down links looks like below:-

To edit a drop down link section edit at below sample mark-up codes:-

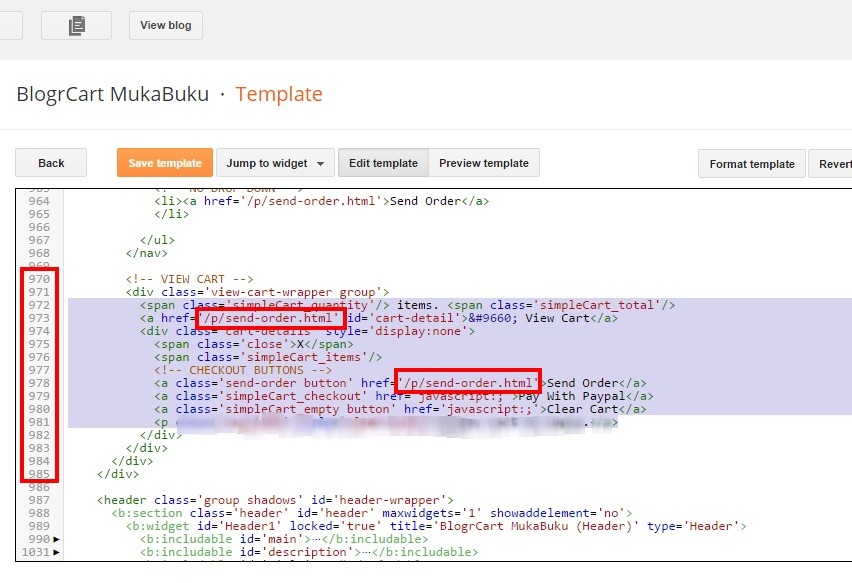
Customize View Cart Drop Down Link
In template editor find codes below:-<!-- VIEW CART -->
Slightly below, you will find these codes:-
<a class='send-order button' href='/p/send-order.html'>Send Order</a>
Customize Header Banner Click to Action Text
In template editor find the Header widget codes below:-
Edit the text as shown in below illustrations.

Gallery Pages Responsive Image Carousel Slider Editing
Find below codes & edit the text to display on top of the responsive image carousel slider.
Slightly below insert the URL to your uploaded image to display a default image if a product image is not available.

Edit the amount of your product post images you require to display for the image carousel. For best images display & page rendering, minimize the amount of product images to display at once.
For instance, 10 post images is efficient & will not harm your page rendering on smaller screen sizes. You can also edit how the product image will display either in random order or depending on the recent published posts by providing a true or false statement.
Drop Down Labels/Categories Editing
Find below codes & expand each " Labels " widget to customize the text displayed for the automated drop down by Labels/Categories.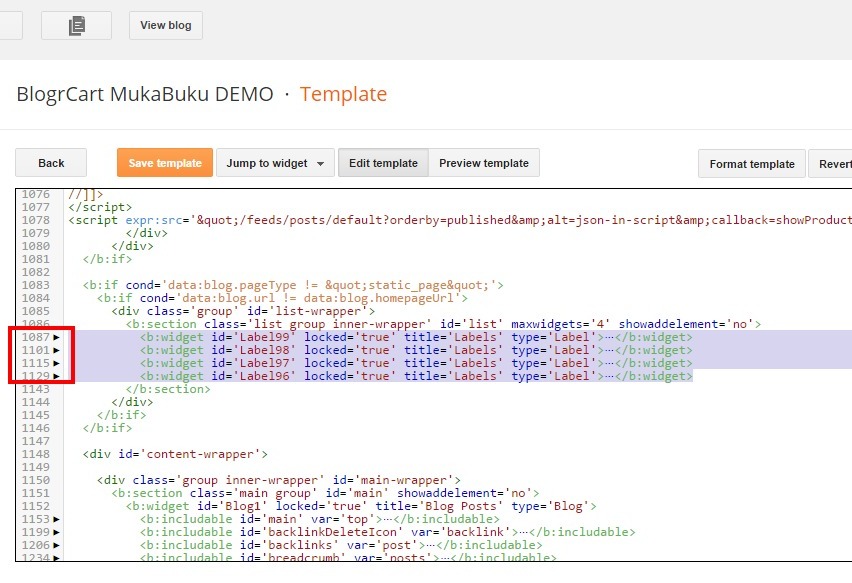
Edit at below codes for text to display at your drop down Labels/Categories:-

To customize the links to be shown for each Labels/Categories, go to any page at your Blogger store. Click the "Pencil" icon located at each drop down labels & edit the links you require to display.
Editing Tabs & Link Text, Section Titles, Activate Default Blogger Comment, Pagination
To edit the tab section & to activate/de-activate the default comment system, expand below Line to view the detailed codes.
Edit the Product Gallery Pages Section Title
At below codes, edit the text for the title to display at your gallery pages.
Edit Product Page Tab/Drawer Link Text
At below codes, edit the text to display for each tab section. The text edited here will display at your product page tab section below the product description/details.
Activate Default Blogger Comment System
To activate the default Blogger comment system, edit by UN-COMMENTING the line of codes in below indicator
An example of an un-comment line of codes should look like so:-
<b:include data='post' name='comments'/>
Related Post Display Editing
Expand the codes as displayed in illustration below:-
Edit the required integer to display the maximum amount of related products to display at your tab section. Also edit the text to display for the related product click to action.

Delivery Info Drawer Section Text Editing
Expand the codes as displayed in illustration below:-
Edit the text by using simple HTML tags before and after your texts. A good example has been pre included to ease your customizations.
A quick note:-
- For titles add a <h3> ..... </h3> tags for the texts.
- For paragraphs add a <p> ..... </p> tags for the texts.
Order Info Drawer Section Text Titles/Paragraphs Editing
Expand the codes as displayed in illustration below:-
Edit the text by using simple HTML tags before and after your texts. A good example has been pre included to ease your customizations.
A quick note:-
- For titles add a <h3> ..... </h3> tags for the texts.
- For paragraphs add a <p> ..... </p> tags for the texts.
Gallery Pages Pagination Editing
Expand the codes as displayed in illustration below:-
Edit the integer to display the amount of product post to display upon users click at below:-

Payment & Social Icon Editing
Expand the codes as displayed in illustration below:-
To edit the payment icon to display REMOVE or COMMENT OUT the codes below:-

To edit the URL to your social profile pages. add the URL to your profile pages as shown below:-

Subscribe by Email Widget Text Editing
Expand the codes as displayed in illustration below:-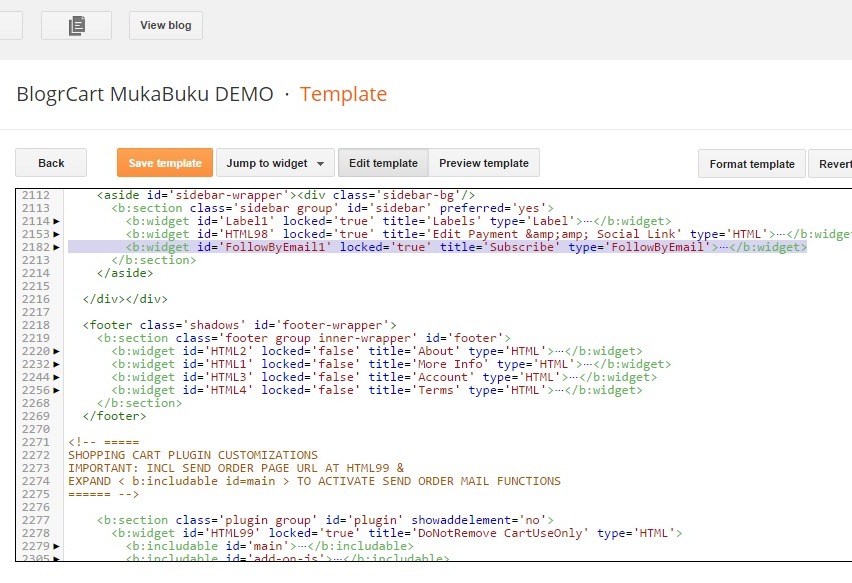
To edit the text displayed at the Subscribe by Email find below codes and edit the texts:-

Customize Continue Shopping URL Link at Send Order Page
Expand the codes as displayed in illustration below:-Edit the text to display at your send order page if a users stumbles upon your Send Order page or even if the user REMOVES/EMPTIES their selected items before checkout. You can edit the " Continue Shopping " URL/link to your preferred page here too.
View screenshot below for indicators.
Responsive Image Carousel Customizations
Expand the codes as displayed in illustration below:-
Edit the integers (in ms) the image slider speed and also the amount of product post image to display at once.

In addition you can customize the amount of product images to display in smaller screen sizes like so:-

Footer Links Examples
At any of your blogger store page, click the " Pencil " icon at the Footer section to add the codes required to display the links. Below is the example:-
Use the codes below as your mark-up structure for the custom FOOTER link display
<ul class='footer-links'>
    <li><a href='#'>Terms</a>
  </li>
    <li><a href='#'>Policy</a>
  </li>
   <li><a href='http://your-blog-page-to-link'>Agreement</a>
  </li>
    <li><a href='#'>Conditions</a>
  </li>
    <li><a href='#'>Software</a>
  </li>
    <li><a href='#'>Application</a>
  </li>
</ul>
404 Page Not Found Editing
To customise the 404 Page Not Found page headings & texts can be done at below section:-
Removing Paypal Checkout Functions
Here's the how to remove the Paypal checkout functions and buttons.Comment out the codes at below screenshot inside <b:includable id='main'> inside HTML99:-

Then find below codes and comment out the Paypal checkout button:-

Click Save Template and View your customisation.
Removing Tax from Shopping Cart
Here's the how to remove the Tax settings functions.Comment out the codes at below screenshot inside <b:includable id='main'> inside HTML99:-

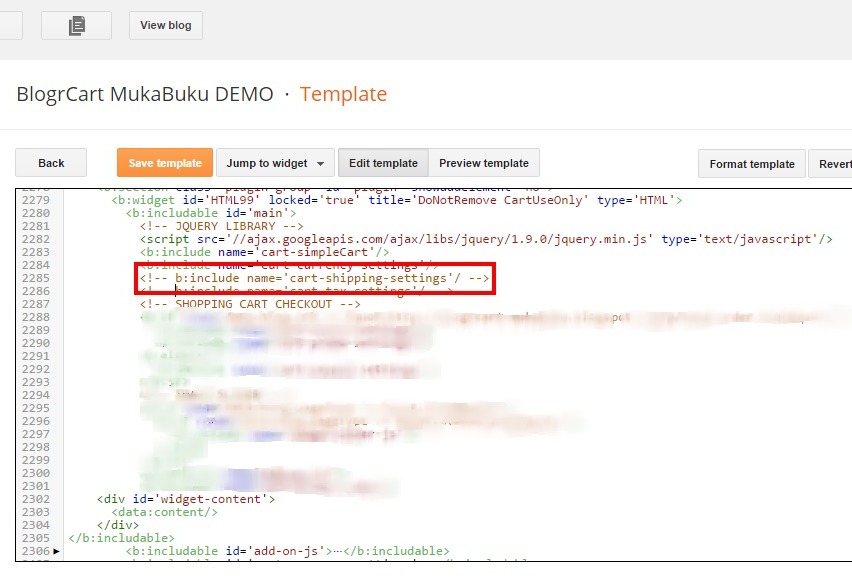
Removing Shipping/Delivery Charges from Shopping Cart
Here's the how to remove the Shipping/Delivery charges functions.Comment out the codes at below screenshot inside <b:includable id='main'> inside Widget99:-
Removing Options (Color or Size or Both)
By default BlogrCart MukaBuku comes with product item options size & colour. The auto post template makes it easier to insert the additional options automatically when publishing a product in your Blogger editor. If the options is not required for a product, here is the how to exclude the item options on your product post from your shopping cart.
To exclude automatically via the Auto Post Template > head over to Settings > Post and Comments > at Post Template find these codes:-
For Items options COLOR:-

At selected codes above, DELETE the code.
By using the reference above, DELETING the highlighted codes on your published product post will also REMOVE the options COLOR from your product selection.
For Items options SIZE:-

At the selected codes above, DELETE them.
By using the reference above, DELETING the highlighted codes on your published product post will also REMOVE the options SIZE from your product selection.
To REMOVE the options from displaying in your Shopping Cart > go to Template Editor > Widget drop down tab > select HTML99 > then expand the codes below at HTML99 widget:-

To remove item options COLOR form shopping cart view COMMENT OUT (preferred)/DELETE the codes below:-
// {attr:"size",label:"Size"}, // COMMENT OUT / DELETE THIS LINE
To remove item options SIZE form shopping cart view COMMENT OUT (preferred)/DELETE the codes below:-
// {attr:"color",label:"Color"}, // COMMENT OUT / DELETE THIS LINE
Add Product Tagging on Product Images
BlogrCart MukaBuku comes with pre-installed product tagging to display at product gallery pages and also product post pages.These tags are automatically activated by using the TITLE attributes from your product post main image. 3 "keywords" have been pre-installed to display the tagging. They are:-
- Keyword: " new " - Will display the "NEW" tag
- Keyword: " sold " - Will display the SOLD" tag
- Keyword: " offer " - Will display the "OFFER" tag

If you want to display the NEW tag at your product image, in Blogger editor > Select your main product image > select the image Properties link > at the image TITLE input field > type the keyword " new " (without quotes)
If you want to display the SOLD tag at your product image, in Blogger editor > Select your main product image > select the image Properties link > at the image TITLE input field > type the keyword " sold " (without quotes)
If you want to display the OFFER tag at your product image, in Blogger editor > Select your main product image > select the image Properties link > at the image TITLE input field > type the keyword " offer " (without quotes)
You can also edit the texts displayed at the product image tags. Expand the codes as displayed in illustration below:-
Edit the text to display at your product images which have been tagged at below codes. The texts is also limited to 5 to 6 characters. Edit to your preference.

Removing Custom Meta Tags (Important)
When all customizations is finished, including deleting the tutorial page/sample pages to make way for your other pages/product post, when you are satisfied with your editing, you can remove the custom meta tags in order for your Blogger store static pages to be indexed by search engines.
To remove the custom meta tags, find highlighted codes & REMOVE/DELETE the entire codes as shown below.

- Customization Ends -